|
1
|
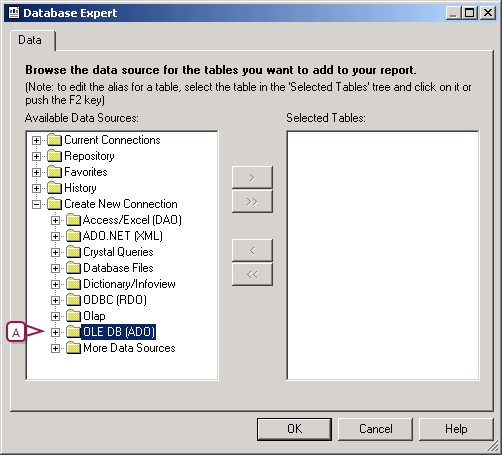
Connect to the database using Crystal Reports [>>]. |
|
2
|
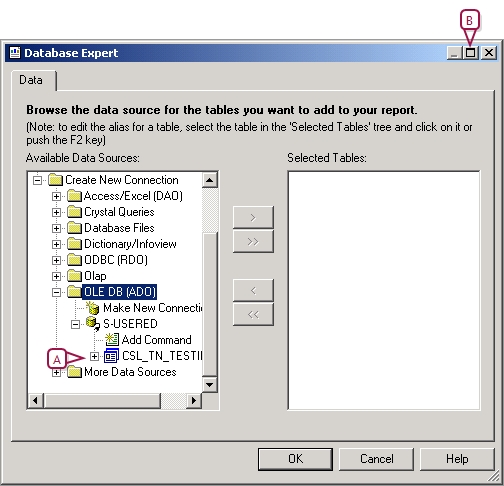
In the Available Data Sources list, click  next to the database name. Note: All views end with _DA. next to the database name. Note: All views end with _DA. |
|
3
|
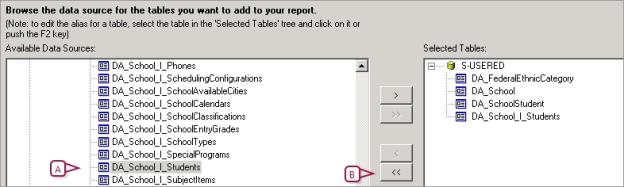
Move each View you want to use for the export to the Selected Tables list and click OK. |
For this example export template, you would select the these Views:
|
=
|
DA_FederalEthnicCategory |
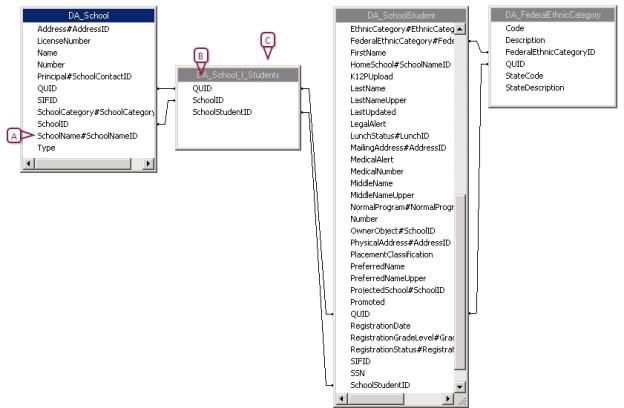
The dialog displays a Links tab [Figure 379] that shows a diagram of the Views you chose and the fields they share.
|
4
|
Click Clear Linksand click Yes to confirm. |
|
5
|
Re-order the Views so the links all move from left to right. |
For the sample export template, you would arrange the Views in the following order from left to right:
|
d
|
DA_FederalEthnicCategory |
|
6
|
Link the views by dragging a field in one View to the field of the same name in another view, depending on the type of information you want. Click OK. The Crystal Reports window displays. |
For the sample export template, the links in [Table 92] would need to exist.
Table 92: Sample links
|
Drag this field
|
To this field
|
|
SchoolID in DA_School
|
SchoolID in DA_School_I_Students
|
|
SchoolStudentID in DA_School_I_Students
|
SchoolStudentID in DA_SchoolStudent
|
|
FederalEthnicCategory# FederalEthnicCategoryID in DA_SchoolStudent
|
FederalEthnicCategoryID in DA_FederalEthnicCategory
|
|
QUID in DA_School
|
QUID in DA_School_I_Students
|
|
QUID in DA_School_I_Students
|
QUID in DA_SchoolStudent
|
|
QUID in DA_SchoolStudent
|
QUID in DA_FederalEthnicCategory
|
|
7
|
Click Field Explorer from the View menu. The Field Explorer pane appears. |
|
8
|
Click next to Database Fields and expand each Data Access View you added to the template. |
|
9
|
Click and drag the fields you want to export from the Database Fields to the Details section on the Design tab in the order you want the information exported. |
For the sample export template, you would click and drag the fields in [Table 93] to the Details section:
Table 93: Database Fields
|
Data Access View
|
Field
|
|
DA_SchoolStudent
|
LastName
FirstName
BirthDate
Gender
|
|
DA_FederalEthnicCategory
|
Description
|
|
10
|
Click Save from the File menu and save the file in the appropriate location. |
 You can do this if your role is District Administrator.[DA]