Typically, a District Administrator can change, delete, and add user accounts. The District Administrator also has the option of rendering a user account temporarily inactive, which prevents the user from using the system but maintains the account.
Within an account, you can adjust the account name, contact information, password, and the roles assigned. You also have the option of rendering a role in a user account temporarily inactive. Note: An inactive role does not receive alerts to which that role is subscribed [>>].
To edit a user account [DA]:
| 1 | On the home page, in the control bar under ADMIN, click District Setup. The District Setup page appears. |
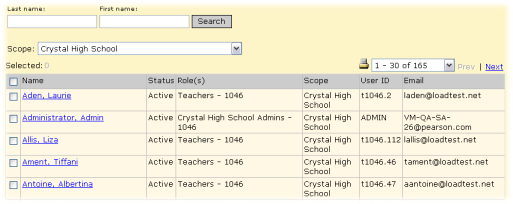
| 2 | Under Users, click Accounts. The Accounts page appears [Figure 117]. |
| = | To create a new user account, in the Actions menu click Add User. |
| 3 | For scope, choose a list of user accounts to display. Choices include all users on the system and all users at specific schools. |
| = | Or search for user accounts based on last or first name. |
| 4 | In the Name column, click a user account name. The Edit User page appears [Figure 118]. |
| = | To delete a user account, select the user and in the Actions menu click Delete User. Note: You can only delete a user account for which there are no roles assigned. |
| 5 | Under General, enter or change information, which includes: |
| = | User ID: The ID the user enters to log in to this account. |
| = | Password: The case-sensitive password the user enters to log in to this account. The user can change this password [see >>]. The password must contain at least one special character. |
| = | Activate/Deactivate: If the account is inactive, activates it. If the account is active, this deactivates it. When an account is inactive, the user does not receive alerts [>>]. |
| 6 | Under Roles, view the roles [>>] assigned to this account. |
| = | In the Active column, select the check boxes of the roles to which the user account should have access. Clear the check box(es) to remove access temporarily. An administrator can deactivate a role across the system [>>]. You can add or remove roles from a user account. |
| 7 | Click OK. |
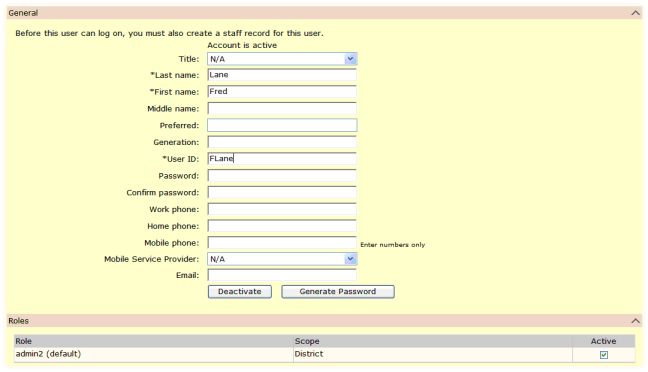
| A | Account is active: Indicates that the account is active. To change this, click Deactivate. |
| B | Active: Indicates that the role is active for this user account. |
Table 41: Permissions pertaining to user account editing
|
To |
You need this permission |
Set to |
|
|
Change user settings such as User ID and password |
Users > User Accounts |
Edit |
|
|
Add, change, and delete users |
Users > User Accounts |
Delete |
Pearson
Always Learning
www.pearsonschoolsystems.com
Tel: 866-434-6276
Email: psstechsupp@pearson.com